

Keith Chan is a New York State-licensed physical therapist and the subject-matter expert for ITNYCPT in New York City. He explains that exercise choice should align with symptoms, movement limitations, and personal goals. General exercises can provide a starting point, but they cannot identify the cause of pain.
Key Takeaways
- Hip joint pain exercises should combine strengthening, mobility work, and gentle stretching, tailored to your symptoms and movement limits.
- Start with controlled exercises such as hip bridges, heel slides, standing hip abduction, and sit-to-stand movements.
- Mild muscle effort may be normal, but sharp pain, instability, or symptoms that remain worse the next day signal that the routine needs adjustment.
- Many people notice mobility changes within two to four weeks, while strength and function may take six to twelve weeks.
- Seek medical care when hip pain follows an injury, limits weight bearing, worsens steadily, disrupts sleep, or occurs with weakness, fever, or numbness.
What Exercises Are Good for Hip Joint Pain?
The most useful hip exercises strengthen the gluteal muscles, thighs, hip flexors, and core. They also move the hip joint through a comfortable range of motion. Start with slow, controlled movements and use a chair or wall for balance support when needed.
The following exercises for hip pain cover strength, mobility, and flexibility without requiring complex equipment. Each exercise includes a starting dose and an easier option. Stop if the movement causes sharp pain, instability, or a lasting increase in symptoms.
Physical Therapy Exercises for Hip Pain
These physical therapy exercises for hip pain support standing, walking, balance, and stair use.
Hip Bridge
Purpose: The hip bridge strengthens the gluteal muscles and the back of the thighs. These muscles help control the pelvis during walking and standing.
Instructions: Lie on your back with each knee bent and your feet flat. Bend your knees to 90 degrees, tighten your stomach, and lift your hips until your shoulders, hips, and knees form a straight line. Hold this position for two to five seconds, then lower slowly.
Repetitions: Begin with 1 set of 8-10 repetitions.
Where to feel it: You should feel the muscles in your buttocks and the back of your thighs working.
Common mistake: Do not arch your lower back or push your hips higher than you can control.
Modification: Lift your hips only a few inches if the full movement causes discomfort.
Standing Hip Abduction
Purpose: This exercise strengthens the muscles on the outside of the hip. These muscles help keep the pelvis level when you shift your weight from one leg to the other.
Instructions: Stand upright while putting your hand on a stable surface. Shift your weight onto one leg, keep your upper body still, and move the other leg sideways. Keep your toes facing forward and return slowly.
Repetitions: Complete 8 to 12 repetitions on each side.
Where to feel it: You should feel the effort along the outer side of the moving hip.
Common mistake: Avoid leaning your body or rotating your toes toward the ceiling.
Modification: Move the leg through a smaller range or use both hands for support.
Sit-to-Stand
Purpose: The sit-to-stand exercise strengthens the hips and thighs for daily tasks. It can make standing from a chair or toilet easier.
Instructions: Sit in a stable chair near the front, with your feet under your knees. Bend your knees, lean your upper body forward, and press through both feet to stand. Lower yourself slowly without dropping into the chair.
Repetitions: Start with 6 to 10 controlled repetitions.
Where to feel it: You should feel the front of the thighs and buttocks working.
Common mistake: Do not let your knees collapse inward or push mainly through one leg.
Modification: Use a higher chair or lightly push through the armrests.
Side-Lying Leg Raise
Purpose: This movement strengthens the outer hip muscles that support balance and pelvic control.
Instructions: Lie on your side with the lower leg bent at a 90-degree angle. Keep the top leg straight, tighten your stomach, and lift the leg without rolling your pelvis backward. Pause briefly and lower it slowly.
Repetitions: Perform 8 to 12 repetitions on each side.
Where to feel it: You should feel the outside of the upper hip working.
Common mistake: Avoid lifting the leg too high or turning the toes upward.
Modification: Bend the top knee slightly or lift through a smaller range of motion.
Hip Mobility Exercises
Hip mobility exercises can reduce stiffness and help restore a comfortable range of motion. These movements should feel smooth rather than forced. They may work well before strengthening exercises or after sitting for a long period.

Heel Slide
Purpose: Heel slides gently move the hip and knee without placing full body weight through the leg.
Instructions: Lie on your back with both legs straight. Slide one heel toward your body until the knee reaches a comfortable bend, then return to the starting position. Keep the heel in contact with the floor.
Repetitions: Complete 8 to 10 repetitions on each side.
Where to feel it: You may feel gentle movement through the front of the hip and thigh.
Common mistake: Do not force the heel closer when the front of the hip starts to pinch.
Modification: Place a towel under the heel to reduce friction.
Knee-to-Chest Movement
Purpose: This exercise moves the hip into flexion and may reduce mild stiffness in the buttocks or lower back.
Instructions: Lie on your back and bring one knee toward your chest while the other leg stays relaxed. Place your hands behind the thigh rather than directly over the knee. Hold briefly, then lower the leg with control.
Repetitions: Repeat 5-8 times on each side.
Where to feel it: You may feel a mild stretch in the buttock or back of the hip.
Common mistake: Avoid pulling the thigh firmly against your body or lifting your head.
Modification: Keep the opposite knee bent with the foot flat, rather than straightening that leg.
Seated Hip March
Purpose: Seated marches strengthen the hip flexors while allowing you to remain supported.
Instructions: Sit upright with your hips and knees bent to 90 degrees. Lift one foot a few inches while keeping your upper body still, then lower it. Alternate sides without leaning backward.
Repetitions: Complete 10 alternating repetitions.
Where to feel it: You should feel effort in the front of your hip and upper thigh.
Common mistake: Do not use momentum or round your lower back.
Modification: Lift the foot only one inch or support your back against the chair.
Stretches for Hip Pain
Stretches for hip pain should create mild tension, not sharp, burning, or pinching pain. Hold each position without bouncing and breathe normally. Stretching may improve comfort, but it should not replace strengthening or active movement.
Half-Kneeling Hip Flexor Stretch
Purpose: Hip flexor stretches target the muscles at the front of the hip, which may feel tight after prolonged sitting.
Instructions: Kneel with one foot forward and the front knee bent at a 90-degree angle. Keep your trunk upright and gently shift your weight forward. Stop when you feel a stretch in the front of the rear hip.
Repetitions: Hold the stretch for 20 to 30 seconds, then repeat 2 times per side.
Where to feel it: You should feel mild tension at the front of your hip or upper thigh.
Common mistake: Avoid arching your lower back or leaning your upper body far forward.
Modification: Perform the stretch while standing with one foot behind you if kneeling is uncomfortable.
Seated Figure-Four Stretch
Purpose: This stretch targets the outer hip and buttock muscles.
Instructions: Sit upright and place your left ankle over your right thigh. Keep your left thigh relaxed and lean forward with a straight back until you feel a stretch. Repeat on the other side.
Repetitions: Hold the stretch for 20 to 30 seconds, then repeat 2 times per side.
Where to feel it: You should feel tension around the outer hip or buttock, not deep inside the joint.
Common mistake: Do not push the knee downward or round your back.
Modification: Place the ankle lower on the opposite leg if the full position feels too strong. Some people sit on the floor for this movement, but a chair usually places less pressure on the knees and back.
How to Build a Hip Exercise Routine
A simple routine can include one mobility exercise, two strengthening exercises, and one stretch. This provides enough variety to work on movement, strength, and flexibility without creating unnecessary fatigue. Most beginner sessions can take 15 to 20 minutes.
For example, start with heel slides, then complete hip bridges and standing hip abduction. Finish with a seated figure-four or hip flexor stretch. Change the routine when the exercises become easy or when your symptoms suggest a different movement is needed.
Warm-Up, Sets, and Frequency
Warm up for five to ten minutes with easy walking, light cycling, or gentle heel slides. Many people start with one or two sets of 8 to 12 strengthening repetitions, 5 to 10 mobility repetitions, and two stretch holds. Three or four exercise days per week may be enough at first.
Hard strengthening does not need to happen every day. Your schedule should reflect pain sensitivity, training experience, job demands, and other activities. A person who stands all day may need more recovery than someone with a desk-based routine.
Adding Resistance
Increase difficulty when you can complete every repetition with steady form and no lasting increase in symptoms. You may add a resistance band, increase the range of motion, or reduce hand support. Change only one part of the exercise at a time.
Stay at the same level for one or two weeks when the routine still feels challenging. Return to an easier version when pain or stiffness remains higher the following day. Progress should feel controlled rather than rushed.
How to Exercise Safely With Hip Pain
Hip exercises may cause mild muscle effort, but they should not produce sharp joint pain or a lasting flare. Pain should settle after the session and return near its usual level by the next morning.
Reduce the range of motion, resistance, or number of repetitions when symptoms worsen with each repetition.
Common mistakes include:
- Forcing deep squats when the front of the hip pinches
- Stretching through sharp pain
- Increasing resistance and volume at the same time
- Twisting the pelvis during leg raises
- Continuing after fatigue affects form
- Using high-impact exercise during a pain flare
Stop when the leg feels unstable, pain becomes sharp, or you lose control of movement. Muscle soreness usually feels broad and tender, while joint pain may feel deeper and interfere with walking or sleep. Do not keep testing severe or unexplained pain with repeated exercise.
What Causes Hip Joint Pain?
Hip pain may come from arthritis, tendons, muscles, bursae, the labrum, or the lower back. Related hip and knee pain may also affect walking, balance, and other weight-bearing activities.
Pain in the front of your hip may involve the joint or hip flexors, while outer hip pain may involve tendons or a sensitive bursa. Buttock pain may come from the hip, nearby muscles, or referred pain from the spine.
Exercise selection varies because the same movement can help one condition and irritate another. Previous surgery, injury severity, strength, pain sensitivity, daily workload, and health history all affect tolerance. A general routine should serve as a starting point, not a diagnosis.
Does Hip Pain Go Away With Exercise?
Yes. Some hip pain goes away with exercise when weakness, stiffness, or reduced activity contribute to the symptoms. Early mobility changes may appear within two to four weeks, while strength and function often take six to twelve weeks. Significant joint damage, an acute injury, or nerve-related pain may require other forms of care.
Consistency matters, but more exercise is not always better. Sleep, stress, work demands, exercise dose, and movement quality can affect progress. A steady routine that avoids repeated flares usually offers more value than alternating between overtraining and complete rest.
How Physical Therapy Helps Hip Pain
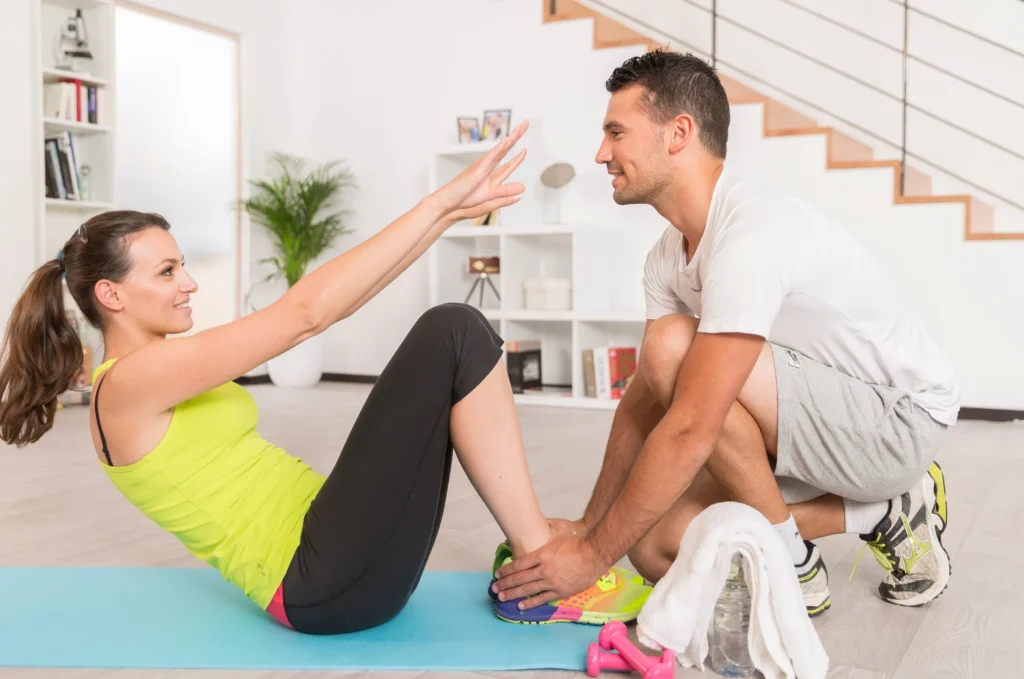
A physical therapy evaluation usually includes a health history, movement screen, strength and mobility testing, and goal setting.
The physical therapist uses these findings to create an individualized plan and changes the exercises as movement and tolerance improve. One-on-one outpatient care can support regular reassessment and home exercise carryover.
Therapeutic exercise may begin with mobility and basic control, then progress toward strength, balance, and activity-specific tasks. Pilates-based therapeutic exercises may support core strength, posture, mobility, and movement control, while related posture-improvement exercises may address trunk alignment and muscular balance.
Manual therapy, including the Graston Technique when soft-tissue work is relevant, may support treatment, but active exercise remains central.
When Should You Seek Medical Care?
Seek an assessment when pain keeps worsening, limits normal walking, disrupts sleep, follows a fall, or does not improve with reasonable exercise changes.
A clinician can help determine whether symptoms come from the hip joint, nearby tissues, or another area. Assessment is also useful after a recent surgery or a sudden injury. After a hip fracture, physical therapy may focus on restoring mobility, strength, balance, and safe walking.
Seek urgent care for severe pain after trauma, inability to bear weight, a deformed joint, fever with a hot or swollen hip, new leg weakness, or loss of bladder or bowel control.
Chest pain, breathing difficulty, or widespread numbness also needs prompt attention. These symptoms are not suitable for home exercise alone.